Makeup

Get a gorgeous look.

Hairs

Get long and silky hair.

Skin care

Get the glowy skin.

Nail Art

Make your nails beautiful.

Mehndi

Know about the beautiful mehndi designs.

Friday, 20 September 2013

Trimming

 How to Trim & Shape My Hair at Home


You might not be brave enough to change your style without the help of your trusted stylist, but you can handle a quick trim and shape-up between visits. After all, your stylist has already done all the hard work. The lines and the style are there, you just have to knock off the edges. Follow the lines exactly, and you'll end up with a fresh, new trim that didn't cost you a cent. Now, what to do with the money you saved?

1.Wet your hair down with a spray bottle. Hint: Put warm water in the bottle and you won't get the chill factor. Comb through your hair and determine the basic shape of your cut. Section it off and comb it out from your head in small sections. Look at the lines. Do they look like something you can follow? If it looks too intricate, don't do it. But if it looks pretty straightforward, go for it.

2.Comb your hair straight down, parting it in the middle. Cut around the bottom perimeter of your hair, removing about 1/2 inch -- any more than that is not considered a trim.

3.Separate your bangs -- if you have any -- from the rest of your hair and comb them toward the center of your nose. Take off 1/2 inch. Comb your bangs straight up, taking off another 1/2 inch to add layers.

4.Carve out a center strip of hair on top of your head measuring about 1-inch thick. Comb the strip straight up and trim the ends. Always follow the lines left by your stylist.

5.Continue the strip down the back center of the head, hold it out and trim it. Work your way around the head, one side at a time, lifting up 1/2-inch sections and trimming them. When you lift up each section, make sure you have a bit of the top strip in there and some hair that you cut from the previous section. Use that hair as a guide, to help you keep it all even.


Things You'll Need
1.Spray bottle
3.Sharp scissors -- ones for cutting hair, if possible
2.Comb

Tips & Tricks
If you can't set up mirrors so that you can see the back or can't hold your hands just right to make the cut, ask for a friend to help you. There's no sense in getting all cramped up if you have someone who can help.

If it's been more than eight weeks since your last salon visit, don't even think about taking those scissors to your hair. You won't be able to see the lines your stylist has created because hair grows out unevenly. It's best to leave it to the pros if you've waited too long.

             How To Trim Ur Hair Extensions


Some women enjoy using hair extensions on a daily basis while others turn to them only when they're getting ready for an evening out. Either way, extensions can make you feel supersexy and add a bit of va-va-voom to your style, but you do need to take proper care of your extensions if you want them to last and stay looking lovely. Just like your natural hair, extensions can become damaged and start to look rough and worn. Trimming your hair extensions is simple and can help freshen up your long, add-in locks.

1.Place a piece of cardboard (a piece about 10 inches wide and 10 inches long should be large enough; you just need to ensure the cardboard is wide enough to hold your longest weft) onto a staircase ledge, window ledge or other hard surface with an edge. Be creative! Just make sure you have enough room on the cardboard hanging over the edge to attach the clips from your hair extensions. Sit a door stopper or other heavy item on top of the cardboard to keep it firmly in place.

2.Clip one of your hair extension wefts onto the free edge of the cardboard. The hair on the extension  should hang down and flow freely, allowing you room to work. To keep from driving yourself crazy, you should have an area somewhere around you where you can keep two separate piles: the extensions you have trimmed and those you still have to do.

3.Run a comb down the length of the extensions to remove any knots or tangles. Once the hair is nice and smooth, run the comb through the hair again and hold it in place near the ends. You can stop higher up or lower down, depending on how much hair you want to trim off, but remember that it is always better to cut smaller amounts and have to cut more times than cut too much off all at once because, unfortunately, the hair on your extensions won't be growing back any time soon.

4.Place a pair of scissors at one edge at the bottom of the hair extension and start to make short, precise cuts across the hair, cutting just below the teeth of the comb. Professional hairstylist Ted Gibson states that cutting hair dry works best, as trimming the hair when it's dry prevents you from cutting hair too short since hair will shrink after cutting if you cut it wet. It's important you keep the comb in one position and not move it around because the comb is your guideline; if you keep moving it, your cuts are going to be way off. Continue cutting in this manner until you reach the other side. You may need to go over the ends and snip a few stray hairs here and there to ensure the cleanest cut.

5.Repeat this process on the rest of your hair extensions. As long as you take proper care of your extensions by washing and conditioning them and avoid using heat styling products on them too frequently, you should not have to trim your extensions again for a while. It is well worth the time so you can look hot and sexy, not frumpy with dead hair extensions hanging off your head. Work it!


Things You'll Need
1.Piece of cardboard
3.Comb
2.Door stopper
4.Scissors

Tips & Tricks
If you want layers in your extensions or an otherwise more difficult cut, you may want to pay a visit to your hairdresser and have her cut your extensions for you. Extensions blend better in layered hair, but unless you want to look like a piece of abstract art, having someone cut your hair for you is probably ideal.

                Tips To Trim Curly Hair


Trim your ends to keep your curls looking healthy and neat, and your purse full of cash.
Bun

Curly hair can be difficult to cut and many stylists recently have only begun learning specifically how to do it. These stylists, however, can run your bill up quite a bit more than your neighborhood mall or nail salon’s chops. Trimming your end helps keep your curls looking healthy and neat, and your purse full of cash.

Trimming Basics

Trimming is the easiest way to freshen your look without drastically changing it. However, mastering the technique behind trimming curly hair is a professional talent!  Be sure you know what you’re doing before you cut, or else that big chop you planned for next year may happen today!
  
 1. Trim your curls while damp: Many stylists believe that cutting wet hair gives                                                                         you better control, but the trouble with cutting hair wet on curlies is that our hair has a tendency to shrink. Our wet locks are by no means the length of our dry ones. Often times, trimming hair while wet can result in over cutting. As a rule of thumb, the curlier your hair, the more it will shrink as it dries. Instead of cutting hair wet or dry, trim your tresses while they are damp. Make sure that you scrunch them to add the true texture to your locks. The slight wetness of your hair will help to give you more control, yet the slight dryness will help you to visualize the actual length and reduce shrinkage.

       What You’ll Need

  • Shears
  • Comb
  • Pins or clips
  • Thinning shears
  2. Try dusting instead of full-out trimming: Dusting is a technique that is                                                                                                   easy and fast. It allows you to      snip off your dead ends, and keep your current curly hair style. Start by detangling the hair with a comb. Twist the hair into several pieces around the head. The ends of the twists will show the dead ends that need to be trimmed. The dusting technique is executed best when the hair is dry or slightly damp. This allows you to see where the hair needs to be trimmed. If the hair is too wet, it isn’t as noticeable where to cut.
  1. Optional: Add texture! Adding texture to your hair is a great haircutting technique that removes hair and bulk without shortening the original length of the hair, thus helping you to maintain your current style. You can add texture to your curly hair with thinning shears. Be sure to never use a razor when adding texture as this can often create frizz and weakens the hair overall. Razor cuts on curly hair are best left to the professionals. Women with fine curls should never use a thinning shears, either. Thinning on fine hair will only create thinner hair, as you might imagine.

Avoid the Trim Altogether!

Taking care of curly hair doesn’t have to be a full time job. Simply following some basic tips to avoid hair breakage will keep your locks looking freshly cut, longer.

Final thoughts

Ultimately, trimming your hair will prevent frizz, split ends and an out-of-control look. Be sure that you determine what type of trim you are looking for, though, before you begin. Dusting and adding texture is easily done on your own, but for more drastic cuts, be sure to consult your stylist.


Remove Color Carefully

How To Remove Hair Color At Home?

hair

How many times has this happened to you? You go to a salon and ask for one colour but end up with a completely different colour. You repeat the process again but the colour is just not what you wanted.  You just don’t trust the stylist to do it right anymore.
This might have been a big problem before but not anymore, thanks to hair colour removers. Yup! You can now remove unwanted color from your hair all by yourself at home.


Procedure:

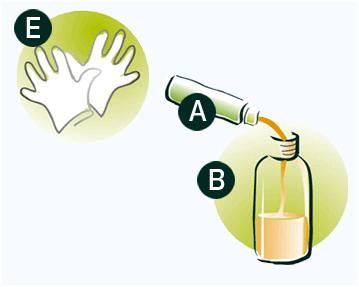
Even before you begin, make sure you have the gloves on that are provided in the kit!

Step 1:

haircolor1
Mix the removing agent and the developer in the bottle given in the kit. This bottle comes with a nozzle and makes the application easy, so it is advisable to use it.


Step 2:

haircolor2
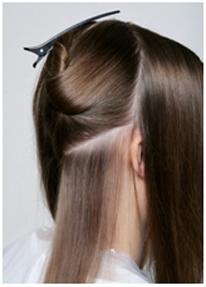
Separate hair into small sections and start applying the solution to the roots of the hair.


Step 3: 

haircolor3
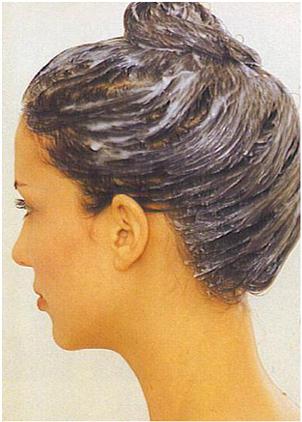
Allow it to rest for the time period mentioned on the box or for 20 minutes otherwise.


Step 4:

haircolor4
Shampoo and rinse as many times as mentioned on the box.

And voila! That color that really bugged you….is gone for good!

Choose Hair Color

How To Choose The Right Hair Color For Indian Skin Tones?

Hair color is a great way to subtly and sometimes drastically change your entire appearance. The right hair color can make you look fab with very little effort. Choosing hair color for Indian skin can be more difficult than any other types. Women don’t realize that, what works on say Western hair, is not suitable for Indian skin tones. Common, how many times have you seen that very blonde aunty walking down the street and stared after her in horror. Another problem Indian women face is the inability to go crazy with hair color because of “what society thinks.”


Hair color ideas 2012 for women

Anyway here’s a little guide on the best hair color for women in India, to give all those confused ladies with blah hair, a ticket to amazing hair! No matter what your skin tone! If you can get your skin tone right for your makeup, you can get it right for your hair too! Check out these hair color ideas for Indian women.

       Hair Color Shades For Indian Women


First things first, you have to know your skin tone. Is it warm or cool? If you turn red and burn in the sun as opposed to tan, you’re probably a cool. If you tan, you’re a warm. Sometimes Indian skin tone likes to be a pain in the butt and you need a professional to decipher it. A hair dresser, a MAC makeup artist or even a BFF with a good eye for color can help!

1. Natural Color:

hair colour for indian skin tone

When it comes to natural colors, browns, reds and burgundy is favored for Indians. The undertone of the skin is very important when you choose a color. If you’re very yellow, you don’t want an ashy brown or gold, you will look jaundiced. Same goes for beauties that tend to go very red, if you choose red hair, you may look like a tomato! Definitely not a good look! The best hair colour for Indian women is one that doesn’t work against their skin tone.

2. Brown :  Brown is probably the safest color you can go for. Again, go according to your skin. If you’re cooler, go for colors like mahogany. For warm skin, go for ash brown.

3. Burgundy : A very popular color that will look best on olive and yellow skin tones. It will suit darker girls.

4. Red : Red is tricky, there are a lot of shades in just red! If you’re fair go for a lighter red or copper. Not orange! Olive girls will look best with blue based reds which are darker. If you have very red skin, try to stay away from red, it will be an overdose of ruddiness.

5. Golden : I don’t think golden is a natural color on anyone with Indian skin but people do love it! So, I feel I should add a bit about it. A full head of blonde is not a winning look; it can make dusky women look very pale and sickly as well as olive ladies, even if they are fair. Cool skinned fair girls can pull it off, but it requires a lot and isn’t something that can be easily done at home! The best way to wear golden is with some brown tones and usually in streaks or highlights. Don’t go full gold. Not only is the gold “color” not flattering, it is also mostly bleach and very harmful for hair.

6. Black : Pure black is a no-no. Black makes your features appear harder and more haggard. It will look like a wig. Go for a dark brown instead.

Highlights and Low lights :

indian hair highlights
If you go for all over hair color, do consider highlights or low lights. Not more than one or two shades lighter/ darker than your color. They add realism and dimension to the hair. Our hair is actually made of many different pigments, if you hold up your natural hair against the sun; you’ll see what I mean. Hair color removes this “natural look” by adding one solid pigment. Adding highlights/ lowlights can add softness and dimension to your hair.

Unnatural colors:


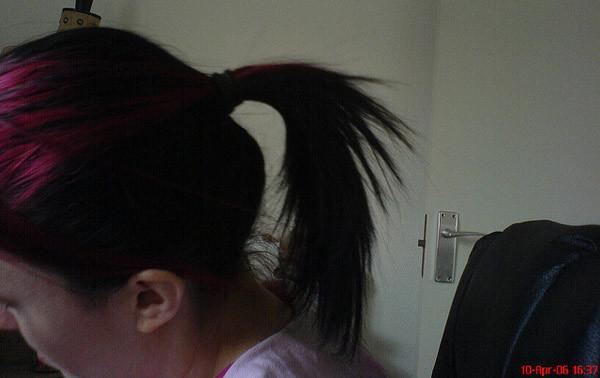
emo hair color
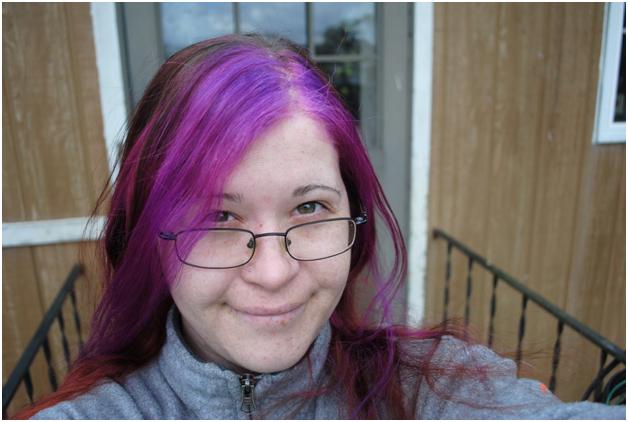
Unnatural colors have not been embraced by Indians as such. Whenever my hair is blue or pink I get a lot of looks and comments too. People like to talk to me about my hair and even ask to touch it! So unless you like a lot of attention, don’t go unnatural! Thin streaks here and there may be your best bet. Purples, plums and fire engine reds are the some of good hair colors for Indian skin that you could try on.

I hope this little guide helped you understand the best hair colors for Indian skin and made you take an informed hair color decision!

Care Colored Hair

13 Tips To Take Care Of Your Colored Hair

take care of your colored hair

A lot of people colour their hair nowadays, from streaking with bright reds or highlighting them with blonde or a full coverage to make a style statement, or sometimes just to cover those embarrassing greys. And for these, there are numerous hair colouring options available in the market.

But unfortunately all of them contain Ammonia, a chemical bleaching agent,  which is responsible for making the hair dry and brittle

Ammonia is important in hair colour styles as helps in the absorption of the colour molecules by the cortex of the hair. But this in turn absorbs all the moisture from the hair.

hair color ideas
colored hairSo now take a look at some of pre and post colouring tips to help prevent damage to your hair , which in turn helps in easy maintenance.
                       

                         Colouring Tips

  • Keep your hair healthy before colouring them, which means no chemical treatment at least 3-4 weeks before you colour your hair.
  • Get a proper hair cut or trim, so that your hair is manageable and you do not have any split ends.
hair service
  • Deep condition your hair to boost proper strength and volume. Mix egg, banana and yoghurt in equal quantities. Apply this pack on your hair and keep it for an hour. Rinse off with a mild shampoo. This is an excellent home remedy for smooth and soft tresses and will condition them well.
hair pack chemically treate
  • Wash and condition your hair properly just before colouring, as colour will not set on a greasy scalp.
  • Always do a patch test if you are colouring your hair at home. This will ensure that you are not allergic to that product. And if there is any reaction, then change the brand.
  • If possible, then always go to a salon or a get a stylist to colour your hair as they know the best techniques to do so. Professional help is always better rather than doing it at home alone.


                        Post colouring tips

  • After colouring your hair, always remember to wash your hair with the special “colour protecting” shampoo. This specially created shampoo will not wash away the colour and will help the colour molecules to set in better.
  • A good conditioner is very important to maintain the moisture balance in your hair. Since your hair has been treated with chemicals like ammonia, therefore always use a “colour protecting conditioner”. This will nourish it and provide its natural shine and lustre.
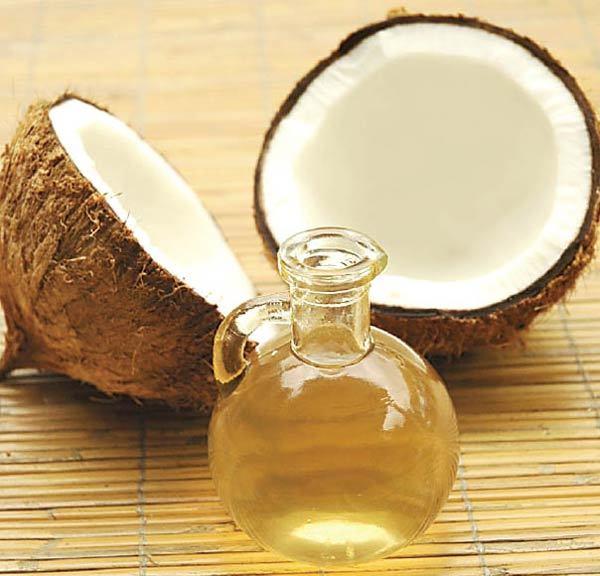
  • Go back to the old and famous condition method of using hot oils. Use olive oil, almond oil or coconut oil to deep condition your hair.
almond oil isolated
coconut oil fatty acid
  • Use a hair mask at least once a week (protein mask) to replenish the hair, preferably a homemade protein hair mask. A banana and honey mask or egg and mayo mask will suit you the best.
banana coconutOil honey hair
  • It is advisable to use a leave-in conditioner. This would make your hair more manageable and also protect it the harmful UV rays of the sun.
  • Avoid the use of blow dryer and let your hair dry naturally. If you have to use, then switch to cool setting to dry your hair.

hair blow drying
  • Chlorine is very harmful for coloured hair. It can alter the actual colour of your hair. So avoid setting into the pool just after colouring your hair. And if you do, always wear a swimming cap before you step in.
swimming cap

Coloured hair makes you look glamorous and stylish, take care of it and it will make you look chic.
Till then take care.

Keep it stylish!!!!!

Hair Coloring

4 Simple Steps to Colour Your Hair At Home


hair color at home

‘Break free’ our heart screams! We all feel the need to do something different from what everyone associates with us… And changing hair colour sometimes can just do wonders for us.

Market is flooded with different types of brands and variety including permanent, semi-permanent and temporary, with different pricing to suit all market domains.

All however it takes is to choose the product that is free of harsh chemicals and doesn’t let you loose your hair.

Hair colouring at home might sound interesting but is challenging too, as a lot of care has to be taken. So we present 4 Simple Steps on how to Colour your Hair at home.


 Needed:
  • Colour
  • Developer
  • Bowl and brush
  • Towel
  • Gloves
  • Clock


Procedure:

Step1: Mixing the Colour:

home remedies for hair color
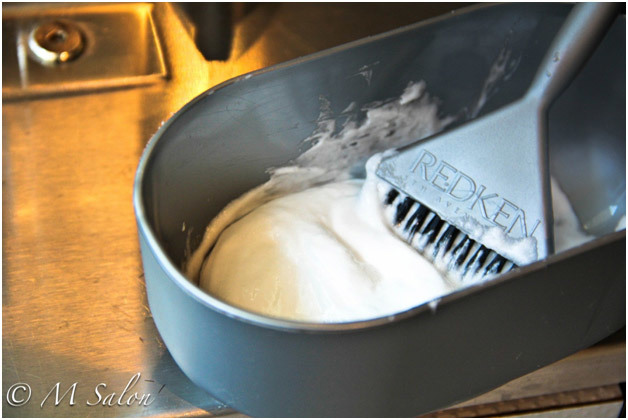
  • Pour the colour and the developer into a plastic bowl and mix it well with the hair colour brush to ensure that the colour comes out right.
  • Place a towel around your head to keep the colour from dripping onto your clothes.
  • Wear gloves to avoid the colour from transferring on to your hands, and also make sure to apply Vaseline or lots of oil around the hair line to keep the colour from spreading.
  • Now you are ready to start application.


Step 2: Applying the Mixture:

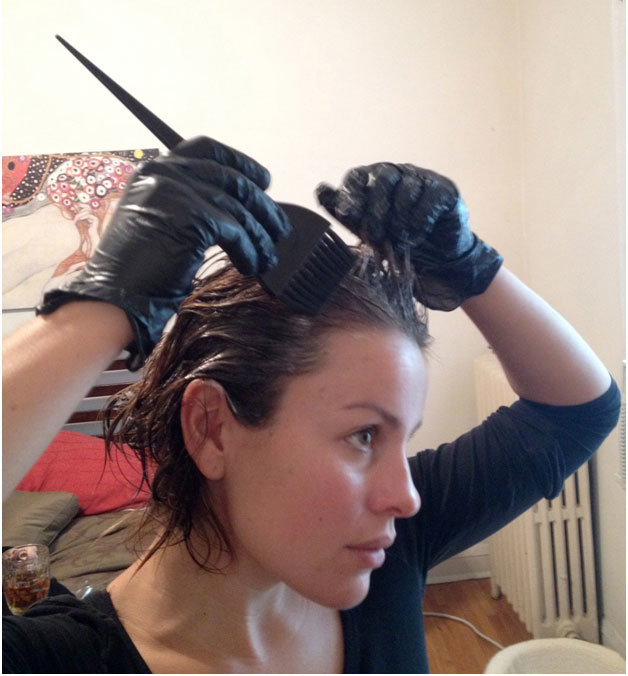
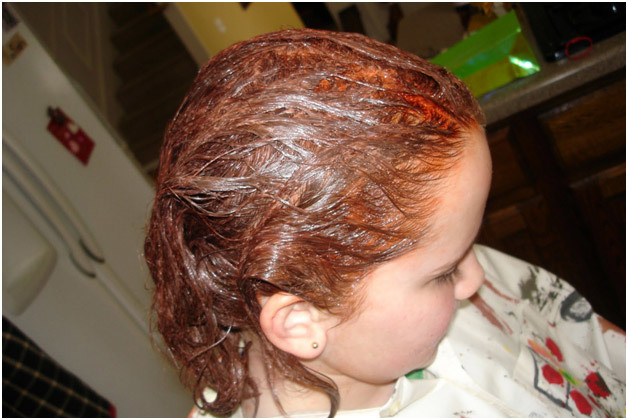
how to apply hair color at homeTo  

The Roots

i. Start from the hairline on the forehead.
ii. Take a small section of your hair and apply the colour on this portion. Repeat the same action until you reach the hair line at your neck.
iii. Leave it on for the stipulated period of time and if no time is mentioned wait for 20 minutes.

·      To the Tips

i. After the stipulated wait period, apply the rest of the mixture on to your hair too.
ii. Then pull it to the tips with a wide tooth comb to ensure even distribution
iii. Leave the colour on the end for no more than 5 minutes.

Step 3: Rinse

homemade hair colouring tips

After the time period has elapsed, rinse your hair thoroughly with tepid water till the water runs clear. Make sure that the colour is thoroughly removed to avoid product build up, which further can cause possible skin eruptions such as dandruff.

Step 4: Condition

hair coloring tips at home
Conditioning is a must as any chemical; no matter how well formulated will never be 100% suitable for your Hair! You can use the conditioner given in the set for 2 minutes and then rinse it off.

Tips
  •   When you pick a colour, never go beyond two shades darker or lighter than your natural colour.
  •  Apply on unwashed hair to avoid the tingly and uncomfortable feel during colouring.
  •  No matter how many times you have done this at home, always read the instructions. The specified time periods, application procedures and after hair colour routines may vary for different brands.
  • If you want a colour that is entirely different from your natural shade, go to a SALON! Do not attempt it at home.
  • For allergic free applications, ensure that you do a strand check. If there is no adverse effect, you could go ahead with colouring, and if not avoid application or check with your dermatologist.
  • For positive results one must keep in mind that the right technique of colour selection, preparation, application and maintenance will help you keep dryness at bay, while offering you shiny and soft hair.